<iframe width="100%" height="450" src="https://www.youtube.com/embed/nz57igUDjxU?si=-rkGp8T3i-q1H5zG" title="YouTube video player" frameborder="0" allow="accelerometer; autoplay; clipboard-write; encrypted-media; gyroscope; picture-in-picture; web-share" referrerpolicy="strict-origin-when-cross-origin" allowfullscreen></iframe>
*(Watch the full video tutorial above to see the Voice Enhancer in action!)*
Introduction to FaizanKiAwaz: The Ultimate AI Voice Enhancer
If you're a content creator, podcaster, or video editor, you know how incredibly frustrating bad audio can be. Background noise, low-frequency rumbles, harsh sibilant "S" sounds, and inconsistent volume levels can ruin an otherwise perfect recording. While there are premium VST plugins and expensive software suites available to fix these issues, I wanted to create something completely free, highly effective, and deeply integrated with artificial intelligence. That's how FaizanKiAwaz was born.
In this comprehensive deep dive, I'm going to walk you through exactly how I built this professional-grade AI Voice Enhancer tool. I will explore the architecture, the specific Digital Signal Processing (DSP) algorithms used, the deep learning AI models that power the noise cancellation, and how I packaged it all into a sleek desktop application using web technologies.
And the best part? I'm going to give you the exact "Master Prompts" I used so you can recreate this entire tool yourself using the Antigravity IDE. By the end of this article, you will not only understand how advanced audio processing works in Python, but you'll also be able to download the complete source code using the ZIP file provided at the bottom of this page.
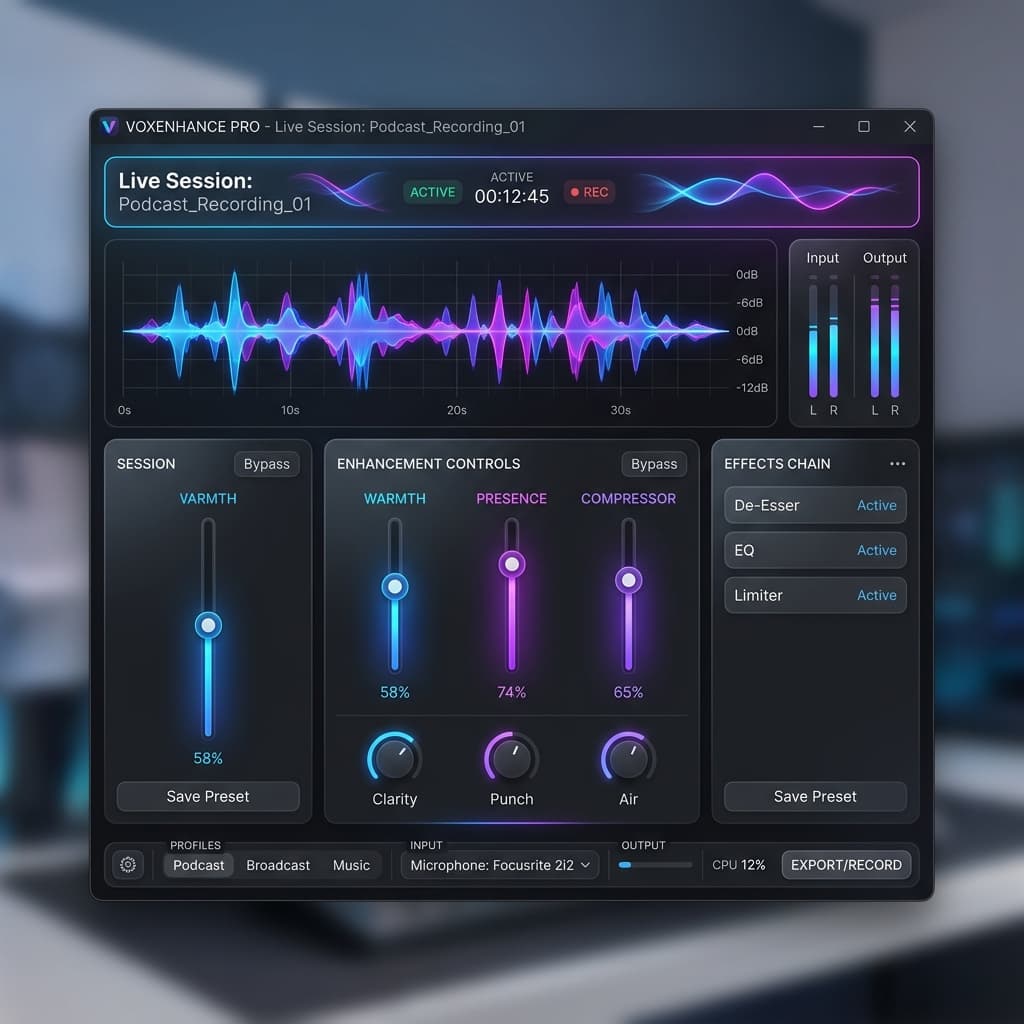
*Image: Building a professional, dark-themed audio interface.*
The Vision: Why Build Another Audio Tool?
Audio engineering is often seen as a dark art. Getting vocals to sound "punchy," "warm," and "clear" usually requires chaining together multiple plugins: an EQ, a De-Esser, a Compressor, a Limiter, and a Noise Gate. For beginners, dialing in the perfect settings on a compressor is overwhelming. My goal was to build a tool that abstracted all this complexity behind simple, intuitive sliders.
I envisioned a tool where the user could simply check a box for "Studio Air" or adjust a slider for "Warmth," and under the hood, the application would automatically calculate the complex math required to apply a 3-band parametric EQ. Furthermore, with the rise of AI, traditional noise gates are obsolete. I wanted to integrate a real-time neural network that could distinguish human speech from background noise and remove it seamlessly.
This vision perfectly aligns with my philosophy of building premium, highly-functional AI SaaS applications.
The Tech Stack: Bridging Web and Desktop
To build FaizanKiAwaz, I had to carefully select a technology stack that was powerful enough to handle heavy audio processing, yet flexible enough to provide a beautiful, modern User Interface. Here is the architecture I landed on:
- Python Backend: Python is the undisputed king of AI and scientific computing.
- Flask Framework: I used Flask to spin up a lightweight local REST API server.
- Sherpa-ONNX & GTCRN: For the AI denoising, I utilized a GTCRN neural network model to separate speech from noise.
- SciPy & NoiseReduce: For traditional DSP (EQ, Filtering, Limiting).
- HTML, CSS, Vanilla JS: The frontend is built using standard web technologies.
- PyWebView: To make this feel like a native application rather than a website, I wrapped the Flask server inside a desktop window.
- PyInstaller: Finally, I used PyInstaller to bundle everything into a single Windows
.exefile.
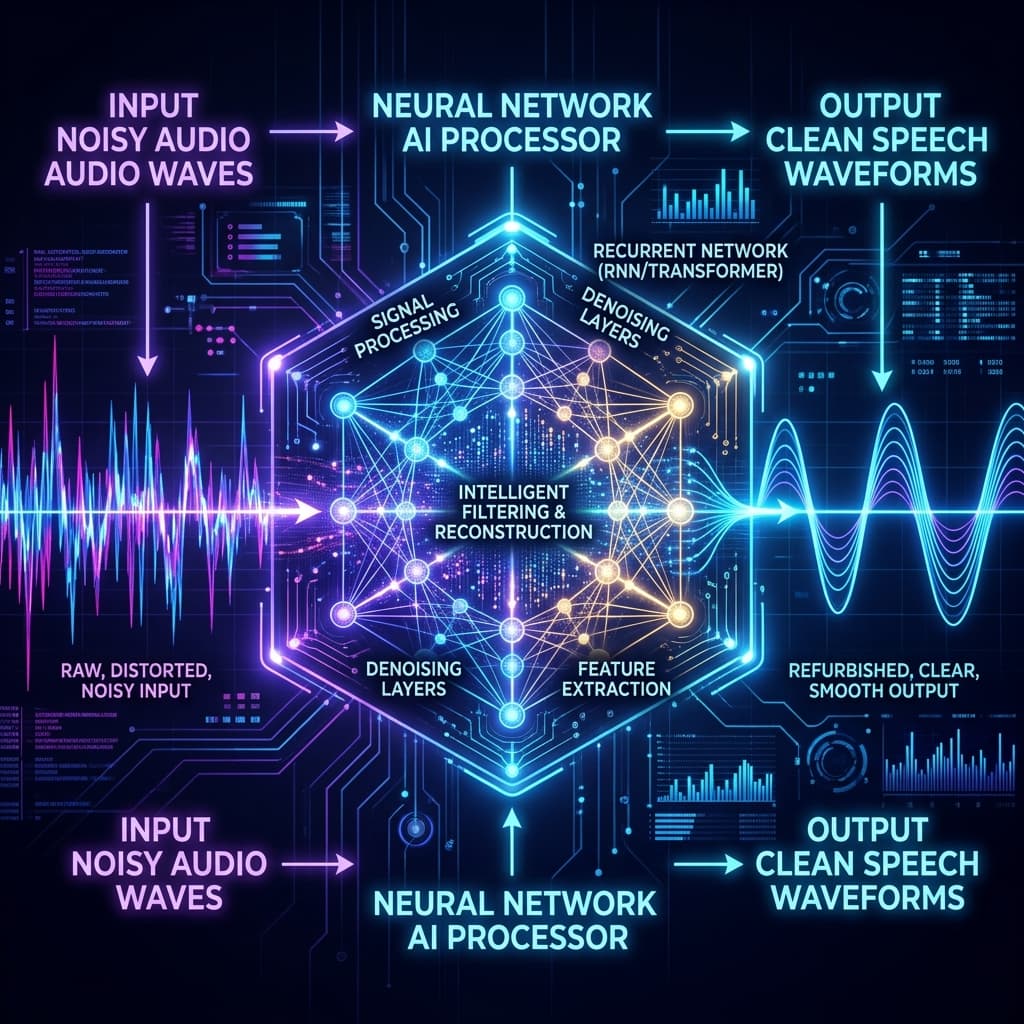
*Image: Writing the Python DSP pipeline.*
Deep Dive into the Audio Engine
The heart of FaizanKiAwaz is the audio_engine.py file. This script is a masterclass in sequential audio processing. Audio must be processed in a very specific order to achieve professional results. Here is the exact pipeline:
Step 1: Fast Resampling and Normalization
When a user uploads an audio file, it must be converted into a raw array of floating-point numbers. I optimized the pipeline by using the soundfile library combined with soxr. The audio is forcefully converted to mono and resampled to 16,000 Hz for the AI model.
Step 2: AI Denoising (GTCRN Model)
The engine loads the gtcrn_simple.onnx model using Sherpa-ONNX. GTCRN analyzes the spectrogram of the audio, predicts a complex ideal ratio mask, and applies it to filter out everything that isn't human speech. I also added a "Wet/Dry Blend" feature to retain the natural timbre of the voice.
Step 3: Rumble Cut (High-Pass Filter)
I implemented a strict 80Hz High-Pass Butterworth filter using scipy.signal.butter. This mathematically calculates filter coefficients that aggressively roll off any audio frequencies below 80Hz (like microphone bumps or passing trucks).
Step 4: The Studio De-Esser
Sibilance (harsh "S" sounds) can pierce the listener's ears. Building a De-Esser from scratch required dynamic equalization:
1. Bandpass Isolation: Isolate frequencies between 5,000 Hz and 8,000 Hz.
2. Envelope Tracking: Calculate the amplitude envelope of this high-frequency band.
3. Dynamic Gain Reduction: Automatically duck the volume of specific high frequencies for a fraction of a second when they spike.
Step 5: Three-Band Vocal EQ
The Vocal EQ module applies three distinct parametric EQ bands:
- Warmth (150Hz - 300Hz): A broad boost for vocal depth.
- Presence (2.5kHz - 4.5kHz): Improves speech intelligibility.
- Studio Air (>6.5kHz): Adds a crisp "sheen" to the top end.
Step 6: Dynamic Vocal Compressor & Limiter
The custom compressor tracks the RMS envelope and applies dynamic gain reduction with Auto-Makeup Gain. Finally, the Limiter scales the entire file down so the highest peak hits exactly -1.0dB to prevent digital clipping.
Recreating FaizanKiAwaz: The Master Prompts
You don't need to be a senior software engineer to build complex applications; you just need to know how to prompt the AI effectively. Below are the exact "Master Prompts" you can use to reconstruct the FaizanKiAwaz application in the Antigravity IDE.
If you enjoy building advanced tools with AI, check out my guide on building an AI free animation video generator.
Prompt 1: Project Initialization & Audio Engine
I want to build a desktop Voice Enhancer application in Python. First, create the core DSP audio engine in a file called 'audio_engine.py'.

Requirements:
1. Create a class called AudioProcessingEngine.
2. It must load audio files fast using 'soundfile' and 'soxr' (fallback to librosa), converting stereo to mono and resampling to 16000Hz.
3. Integrate AI Denoising using 'sherpa-onnx' OfflineSpeechDenoiser and the GTCRN model. Add a wet/dry blend slider parameter.
4. Add traditional DSP using 'scipy.signal':
   - A Rumble Cut: 80Hz High-Pass Butterworth filter.
   - A De-esser: Dynamically suppress 5k-8kHz sibilance by tracking amplitude envelopes.
   - A 3-Band Parametric EQ for Warmth (150-300Hz boost), Presence (2.5k-4.5kHz boost), and Air (>6.5kHz high-shelf).
   - A Vocal Compressor: Track RMS with a 30Hz low-pass filter, apply dynamic gain reduction based on a strength parameter, and add auto-makeup gain.
   - A Limiter: Ensure peaks never exceed -1.0dB by scaling the numpy array.
5. Provide a master 'process()' method that applies these steps sequentially based on a settings dictionary and saves the output to a WAV file.
Prompt 2: The Flask Backend and Wrapper
Now, build the main application wrapper in 'app.py'.

Requirements:
1. Setup a Flask application that serves static files from a 'static' directory and templates from a 'templates' directory.
2. Create endpoints to serve uploaded audio files ('/temp_uploads/') and processed audio files ('/temp_outputs/').
3. Create a POST endpoint '/api/enhance' that accepts an audio file and a JSON string of settings. It should save the file, call the AudioProcessingEngine's process() method, and return the URLs of the original and enhanced audio files.
4. Implement an automatic downloader for the 'gtcrn_simple.onnx' model via urllib.
5. Use 'pywebview' to open a native desktop window pointing to the local Flask server on port 5000. Run the Flask server in a daemon thread so it doesn't block the webview UI. Make sure the window title is 'FaizanKiAwaz'.
Prompt 3: The Frontend UI
Finally, generate the frontend interface for the Voice Enhancer.

Requirements:
1. Create an 'index.html' file using modern HTML5. Write clean Vanilla CSS in a 'style.css' file.
2. The UI must have a premium, dark-mode aesthetic with glassmorphism elements, subtle gradients, and smooth hover micro-animations.
3. Include an intuitive drag-and-drop file upload area.
4. Create a settings panel with modern sliders (range inputs) for: AI Denoise Mix, De-esser Strength, Compressor Strength, Presence Boost, and Air Boost.
5. Add toggle switches for AI Denoising, DSP Denoise, Rumble Cut, and Normalize.
6. Write JavaScript in 'main.js' to handle the file upload via FormData, send the AJAX POST request to '/api/enhance', display loading states, and finally show two custom HTML audio players side-by-side.
Download The Source Code
As promised, I am open-sourcing the basic code structure of FaizanKiAwaz. You can download the ZIP file containing the Flask backend, the DSP Audio Engine, and the frontend template structure.
*Requires Python 3.9+. Note that to keep the download size small, the pre-trained ONNX models are not included in the ZIP file; the script will automatically download them the first time you run it!*